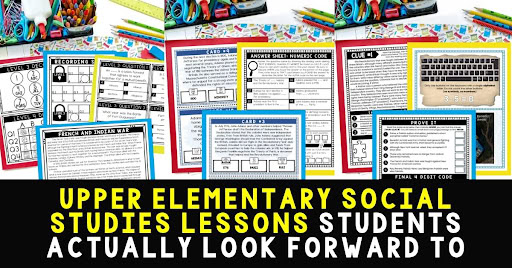
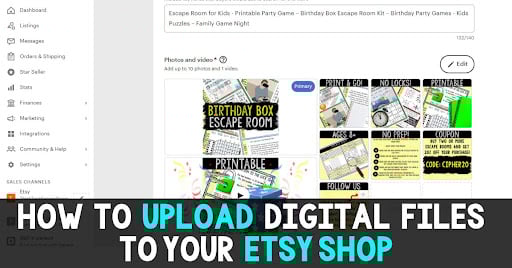
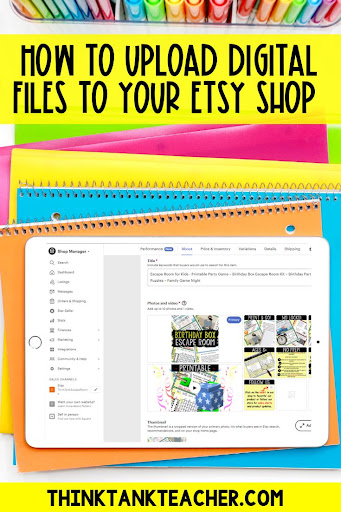
How to upload digital files to sell on Etsy
Selling digital downloads on Etsy is a great way for creative entrepreneurs to make money online. I’ve made more than a million dollars selling escape rooms and other educational resources. With just a few files, you can open up a digital shop on Etsy and make passive income as customers purchase and download your artwork, templates, fonts, and more. Knowing how to upload digital files to Etsy makes getting started so much easier! Voila! This is the first step to your educational printable business.
What are the steps to uploading your digital files to Etsy?
Uploading to Etsy is more than just simply clicking a button. Following these simple steps, however, will set you up for success in your Etsy store and help you to sell on Etsy. These are the same steps I used to put together my successful escape rooms shop!
1. Prepare your digital files
Before uploading to Etsy, you need to have your digital files ready to go. Here are some tips to prepare your digital files to sell on Etsy:
Format files correctly
When it comes to file formats for digital printables, I recommend PDFs. You’ll want to make sure to flatten your PDF to save space prior to upload, protect fonts, and make sure it’s protected. Canva makes this easy with a click of a button.
Organize your files
If you want to be a power Etsy seller, you’re going to have a lot of digital printables. I keep different products (i.e. escape rooms, scavenger hunts) in separate folders to make uploading easier. Use Google Drive or Dropbox to get organized easily.
Optimize images
In addition to uploading your PDFs, you will have JPG or PNG images to upload with your designs and listings. Use image editing tools to properly size and optimize images. This improves quality.
Here are some tips on how to optimize images and tools that can help.
First, size images properly. Etsy recommends images be between 500-2048 pixels on the longest side. Resize large images to be smaller. In addition, compress JPGs and PNGs. For example, use a tool like TinyJPG to reduce file size without sacrificing quality. This makes them load faster to sell on Etsy.
Of course, you may also want to crop and scale to focus images on the main product. You can do this by using editing tools such as Photoshop or GIMP.
Provide previews with low-res thumbnails of products to display in listings.
Finally, name your files properly using descriptive, SEO-friendly names with keywords. You can upload up to 10 images. The goal is to have great looking images that aren’t overly large files. Optimized images positively impact customers and your Etsy shop’s performance.
2. Create Listings in Etsy
Once your files are prepped, it’s time to create listings in your Etsy shop. To begin, login and click “Sell on Etsy” to create a new listing.
Photos
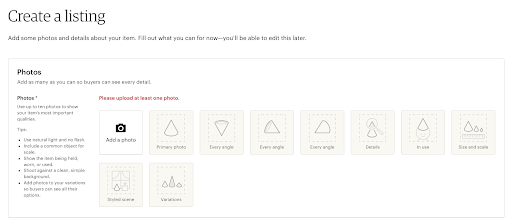
To start, you will want a photo of your digital printable. You may choose to take photos of your item being used. In addition, you can use mockups in Canva or another source to stage your photos. Also, share different pages or views of your educational printable to best showcase the file.
Videos
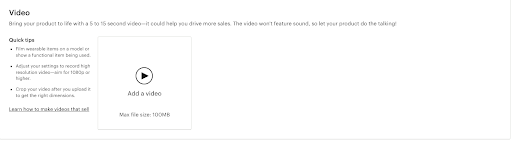
Top Etsy sellers often include videos of their digital printables. Don’t worry about sounds or showing yourself in the video. Even a simple screencast brings your product to the stage. Show it off, Etsy seller!
Listing Details
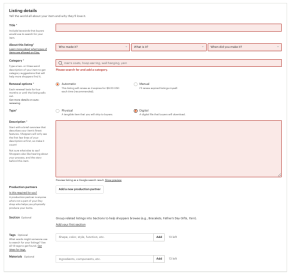
Listing details are all about SEO. Make sure to use Etsy SEO keyword tools to find the best words for your title, description, and tags to sell on Etsy.
You’ll want to select “digital product” for your Etsy educational printables. This sets you up for all the uploading options suitable for digital products.
Make sure to select the date you made the printable or “made to order” to continue. You can also choose to automatically renew your listings. This is helpful if you don’t want your listings to read as “sold out” and be readily available.
Pricing

When it comes to pricing, it’s OK to use Etsy SEO keyword tools to check out what’s trending and the competition. In fact, a lot of native Etsy site tools can help you price your items right. If you have a new item, you can keep the inventory at 1 and have it automatically renewed. Each time, you’ll have a new 20 cent Etsy fee. Consider the costs of making your item (courses, tools, etc.) and the listing fees when pricing your educational printable to make sure it’s profitable.
Uploading Your Files
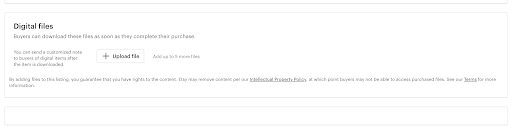
When uploading your digital files, you’ll see options to:
- Upload from your computer – Click browse to find files on your device.
- Enter URL – Provide a link to files hosted elsewhere.
- Enter file details – Manually enter file names, types, sizes.
When uploading your digital files, note that typical PDF activity for kids is 8.5 x 11 (US). However, Etsy has set a limit on file sizes, (maximum of 20MB).
You can upload up to 4 files related to your marvelous Etsy product, but if you have more than 4 files, consider “zipping” your files or sharing links through platforms like Dropbox, Amazon S3, or Google Drive. Be a top Etsy seller by sharing a one-page PDF with a clickable link that takes your customers directly to their downloads.
No matter how you share, once the purchase is finalized, Etsy automatically sends the file to your customer. Just upload according to these simple steps, and all is done for you!
Renew Listings and Manage Files
Don’t forget to renew your listings! If they are selling, you can automatically renew them. For other listings, update and then renew so they stay active in the search. Swap out files anytime by editing the listing. Of course, you can track the number of downloads and sales in your Shop Manager.
With these steps you can easily get digital products listed on Etsy.
Learn even more about how to sell on Etsy and how to create printable escape rooms. You got this! Of course, you have all the tools you need to upload your digital files and be an Etsy seller. Follow these simple steps and start creating and selling educational printables for kids on Etsy.